

Photoshop tutorial: How to realize a texture that looks like an "old cardboard" and use it to create a vintage layout.
To achieve a worn-out effect for a label, you will have to create a texture that looks like old cardboard first - with all of the stains, the sun discolourations, the patterns, and the proper textures included.
The tutorial will show you different screenshots for Photoshop CS4 on a PC. The shortcuts are detailed for both PC and Macintosh, though; the equivalents of the latter will simply be shown in brackets, such as right-click [Ctrl+click].
Whenever possible, we will also try to make sure you can edit everything, just in case you have to make changes to the parameters in your own images. Sometimes, we might also replace newer features with ones that cannot be edited, like smart objects, so that the users of earlier versions will still be able to understand and use them. Naturally, you can still replace these with other methods that are available in your version, as well.
Create a new document that is roughly the same size as your label and has the right resolution for your intended purpose (print or display).
Open a colour fill adjustment layer and choose a suitable colour (in this case, that would be beige).

be sure your foreground and background colours are black and white (press D, just in case), then add a new blank layer and go to filters> clouds.
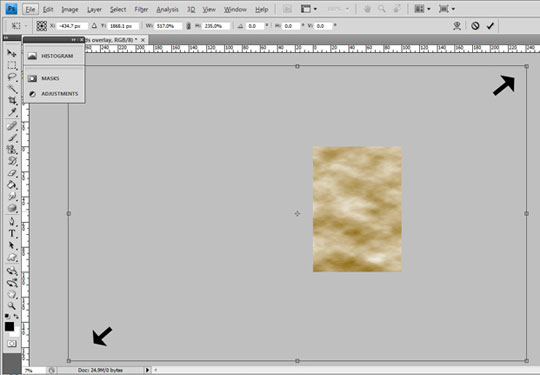
Transform this layer because the pattern will start off too thick by clicking on Ctrl + T [command + T]. Then, extend this layer by dragging any of the nodes (on the corners and in the middle) far beyond the canvas. You might have to zoom out in order to see all of the transform nodes as you drag, though. Once you get a pattern that isn't too patchy, hit enter. To get rid of any excess bits, go to Image>Trim.
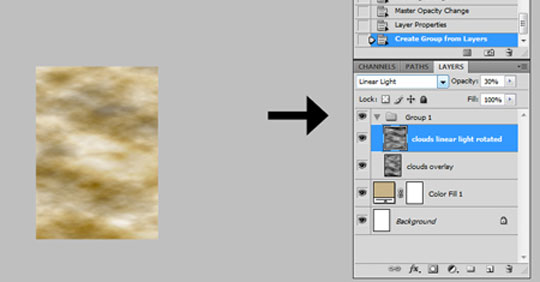
Copy this layer, set it to “Linear Light” in the blending mode and then set the opacity to 30% (or anything that would work well). Transform this new layer by extending it a little bit and rotating it to create various patterns. Experiment until you got something nice. Select your two layers, then group them together Ctrl + G [command + G] and lower the opacity of this group to about 30%.
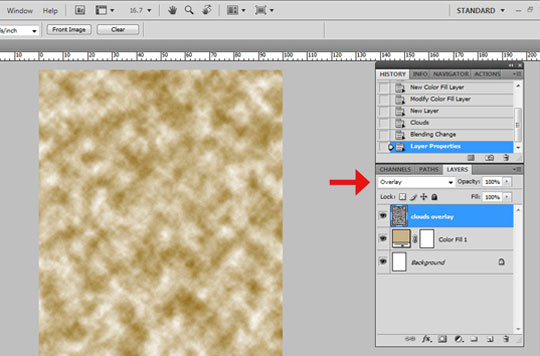
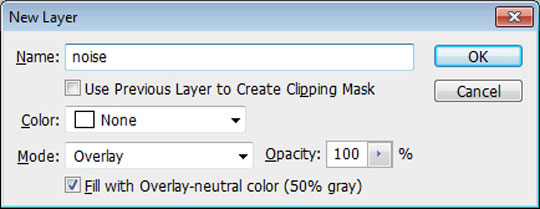
Make a new neutral grey layer by clicking on Alt + Click [Option + Click] on the new layer icon. Then, select “overlay” on the drop-down menu and tick the “Fill with overlay-neutral color” box: see image below.
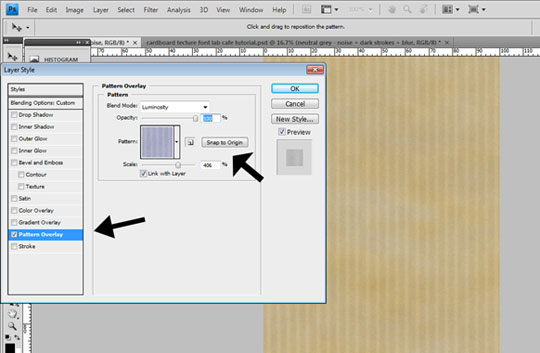
Go to Filters>Noise and apply a huge amount of monochromatic Gaussian noise (our is at around 100px). Lower the opacity to 75%. Optional: Double-click on an empty space near the layer name to prompt the “Layer Style” menu. Then, tick the box next to “Pattern Overlay” and choose a suitable pattern, you can go to the drop down menu to try out different ones, if you want.
Ours has a cardboard texture. You can choose to create it by yourself following the relative Photoshop tutorial: How to create a texture and save it as pattern in the preset manager , or downloading it already done from our "Subscribers area" (the .zip folder include both .psd file and .pat)
Afterwards, set the luminosity to an opacity of 30%.
Make a new blank layer, and use the rectangle selection tool to select the entire canvas, except for an equal space around the borders. Invert the selection by clicking Ctrl + Shift + I [Command + Shift + I]), and fill it in with the color black.

Copy this layer and hide the new one before going back to the first border layer. Apply a big blur at around 50% by going to Filter>Blur>Gaussian blur. Then, on the copied layer, apply a motion blur at around 500 px by going to Filter>Blur>Motion Blur. Then, randomise the border effect and set the opacity to 30%. Set each border layer to “Soft Light”. Make a new blank layer and grab a low opacity brush - preferably something with some texture, like a wet media brush.
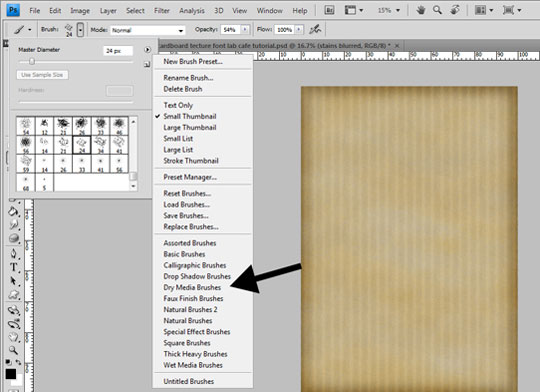
Paint some random stains in black in varying sizes and with different opacity levels. Don't overdo this, though. Blur the layer content a little bit - maybe around 1px - and change the blending mode to “Overlay”.
Make another blank layer and paint on it with a big black stroke at low opacity, but use the blending mode “Luminosity” this time around instead to give off a look of black dust. Beige colours should never show up here. Again, lower the opacity as needed.
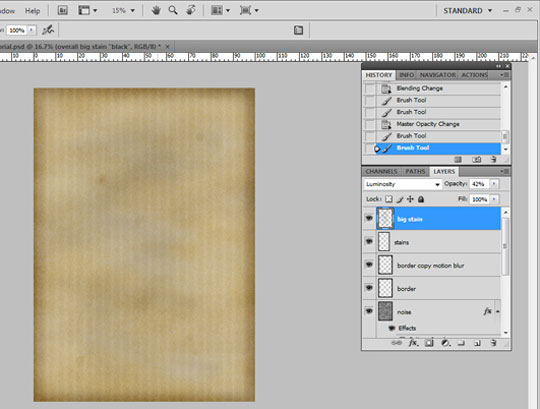
You're done. You should now have a texture layer that you can place on top of any of your designs and resize as needed. You can also change the blending mode anytime.
The most important thing to remember, though, would be not to flatten it! Simply change the “fill” adjustment layer colour, the pattern overlays and some blending modes, and apply a few filters in order to get thousands of different textures. Once you end up with something that you actually like, go to Window>Layer Comp to display a layer composition panel, in which you can save all of your changes in one file. Just name them accordingly.
That's it!
Now you're ready to create a great vintage layout following the next tutorial When fonts and graphic effects come together to create a vintage layout. Photoshop tutorial 01

Search


Photoshop, Illustrator and InDesign are ball leading design software, Photoshop being not...
At Fontscafe we know how busy you are, so we decided to create something for you that was...
Need an easy way to whip up some last-minute Christmas art?
Tada! The 100% absolutely "fre...
We've decided, in the spirit of Valentine's Day, to give away some beautiful Valentine's D...
!!!Updating October 2018:
You can find mow the "Free Chalkbard frames" directly in our "Su...
Comments
May I ask?
Can this be made on Photoshop CS6? Because i'm using CS6, not CS5 :(((
May I ask? Reply
Hi Kathlynne, yes, of course! :) You can do it using CS6! Cheers!